How to change a row background image
First of all log into your website’s back end and then click on your accommodation’s name found in the top left of your screen (in the top black menu line) to bring you to the front end – you should now be viewing the site as if you are a visitor.
Next go on the page you wish to add the new photos to.
Next click on “Page Builder” – (NOT EDIT PAGE) – see screenshot for where you should be clicking (circled in red): https://snag.gy/08fBJk.jpg

This will load the page builder which will allow you to edit all the bits that make up the page.
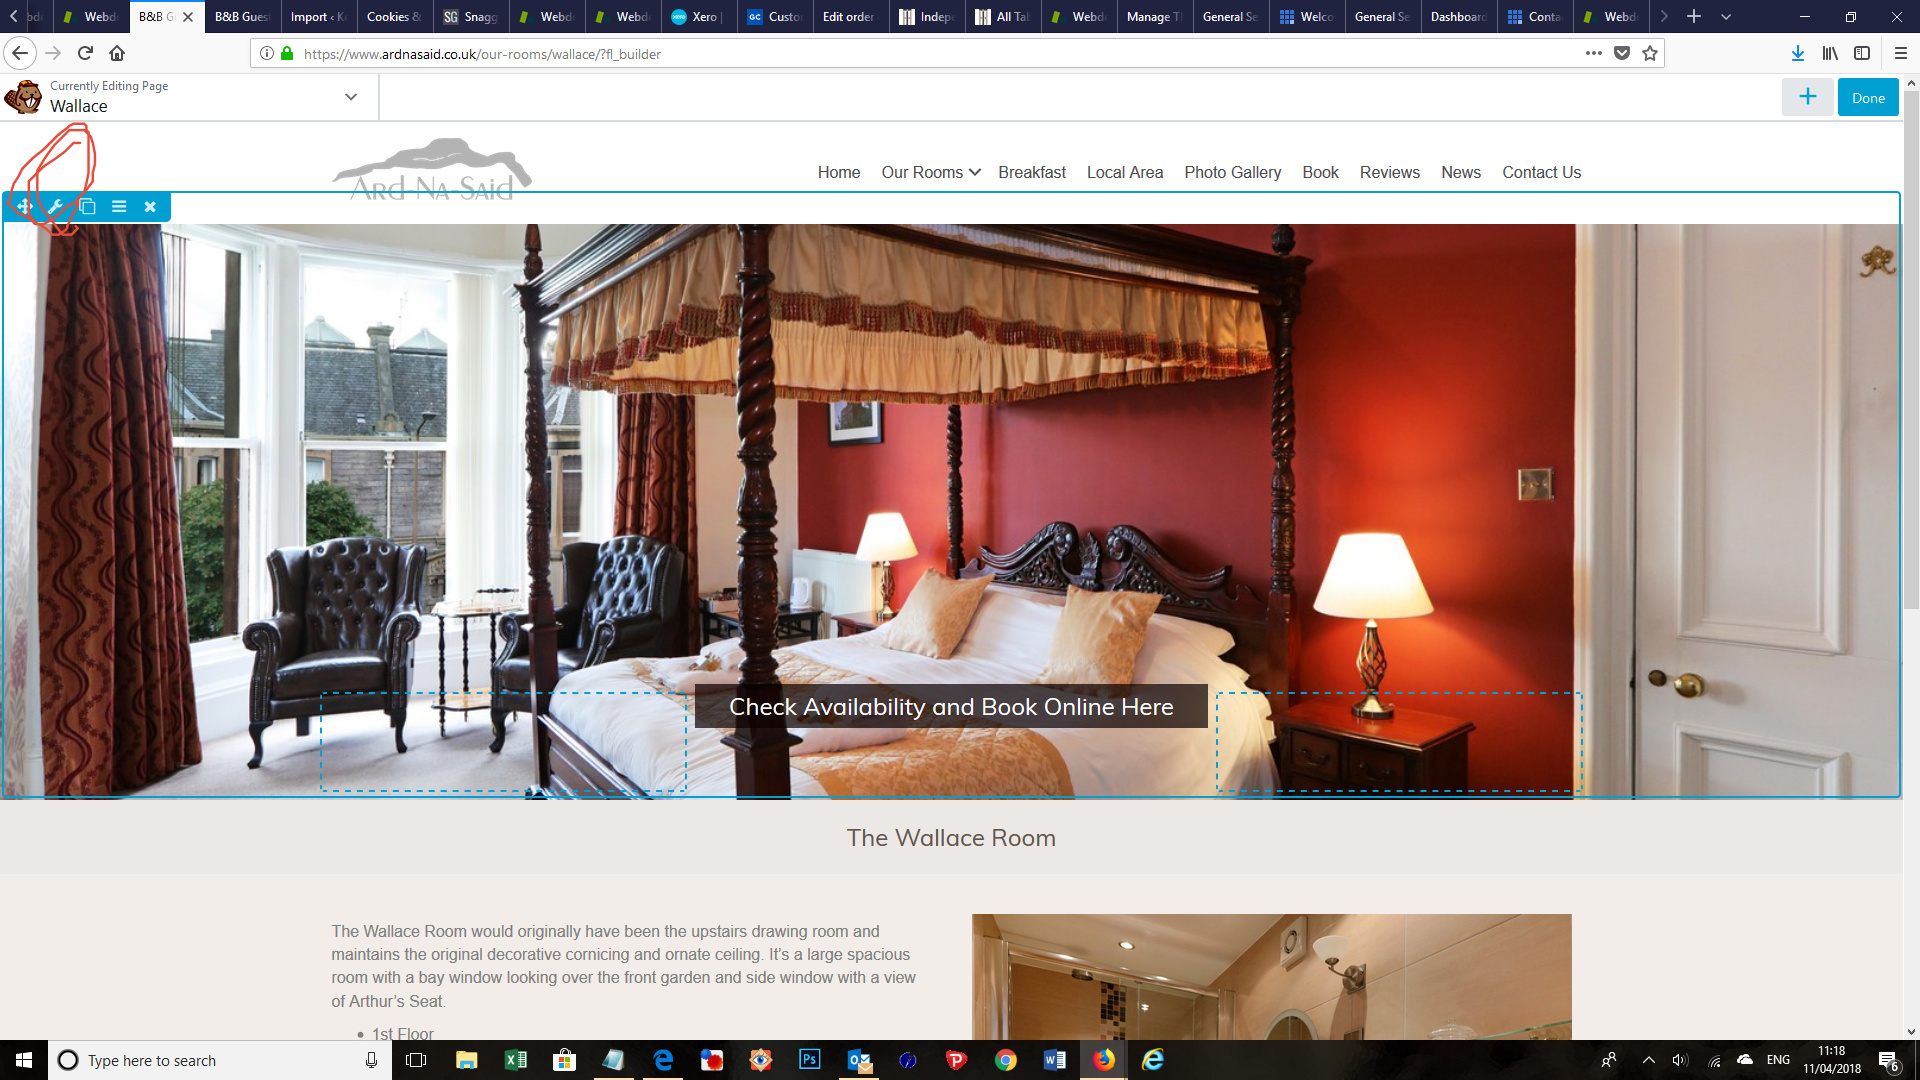
hover over the large header image, and you will see that you will see the whole row is highlighted in blue. See screenshot: https://snag.gy/2yoM9h.jpg

Next, click on the spanner icon to edit the row: https://snag.gy/wDIYtU.jpg
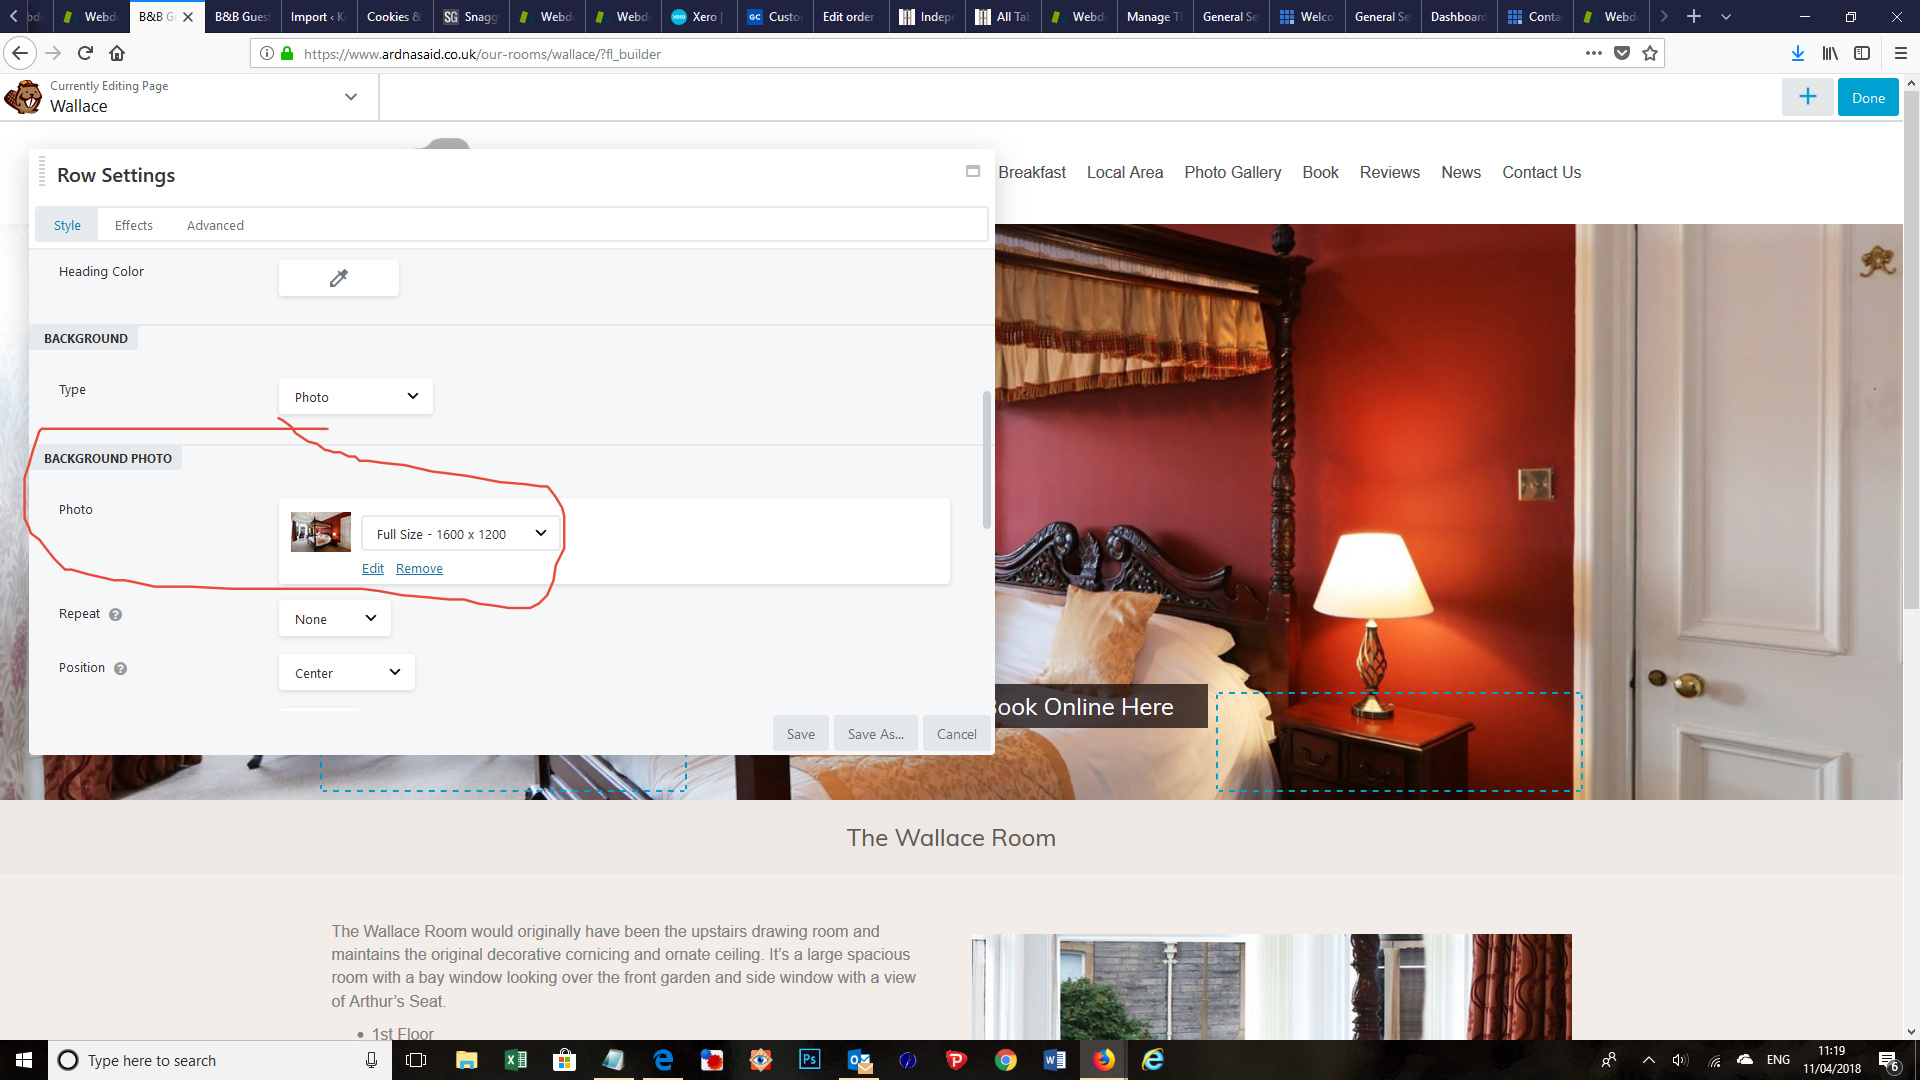
This will bring up a pop up box. Scroll down within this box until you get to the “Background Photo” section – see screenshot: https://snag.gy/jOzHN6.jpg
Click on Edit and then this will bring up your Media Library where you can choose another image.
Select the photo you want and then click on the blue “Select Photo” button – see screenshot: https://snag.gy/GVxeiu.jpg

This will bring you back to the original pop up box for the row, so just click on the “Save” button.
Then click on the blue “Done” button, top right of the screen, and then “Publish” to make your changes live.